
Skyrim Shield Cup Coasters

I have been playing a lot of Skyrim in between projects and was inspired to create a 5" Windhelm cup coaster for my desk. Below is the material list and everything you need to know to make your very own. After you follow the steps feel free to watch the video from my weekly live-stream where I cover the entire process!
Materials
Original Sculpey
Smooth-On Oomoo25
Amazing Casting Resin
Acrylic paints & Testers paint
Art brushes
Clear Tape and Paper
Xacto Knife
One piece of sheet cork
Clear coat and Flat Grey spray paint
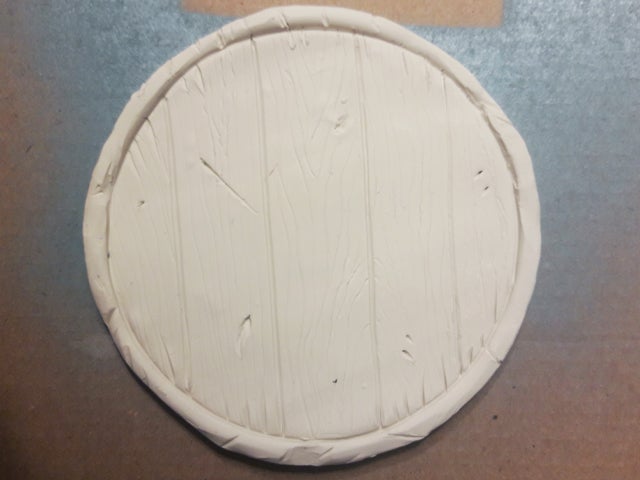
Step 1: Modeling With Original Sculpey
Start with some Original Sculpey, I made the shield 5" in diameter so that it can hold my Nalgene water bottle. You can make yours any size you want as the design can be adjusted.
I used my metal sculpting tools to create the wood and metal textures, I wanted the shield to have a rough look as if it was created quickly and has seen a decent amount of battle.
Once complete I baked the clay in the oven for 30 minutes at 270 degree. I allowed to cool on a cold surface and the model was ready for molding.
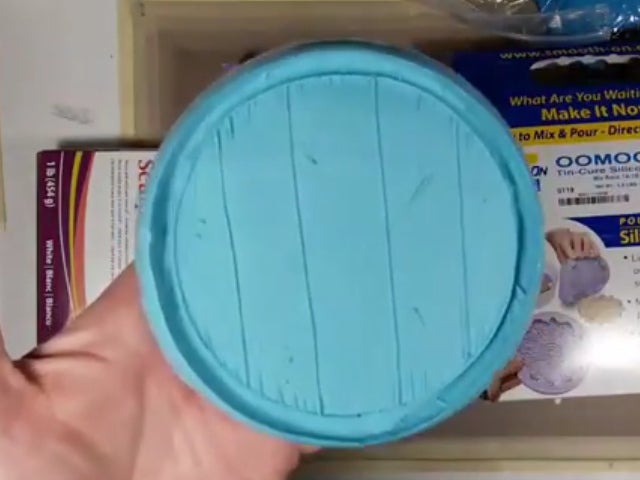
Step 2: Making a Mold
For the molding I followed the instructions on the Smooth-On Oomoo25 box. It is a simple 1:1 mix that is easy to work with.
I used a small bowl to create the mold, I glued the shield to the bottom of the bowl, mixed up my Oomoo25 and poured it into the bowl on top of the model.
Once it had cured I removed the piece form the mold and it was ready for casting.
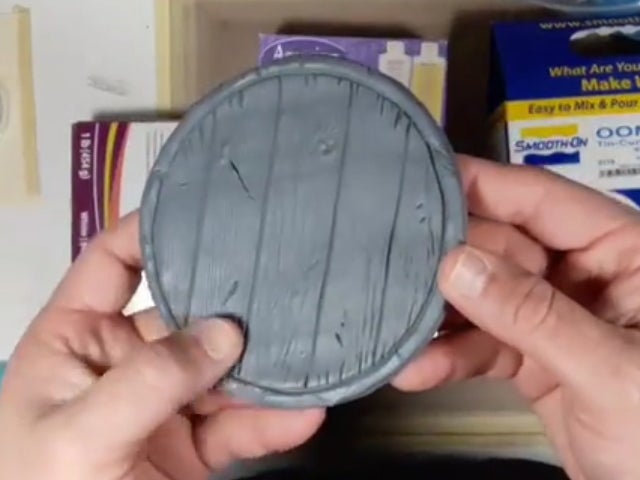
Step 3: Casting and Priming
At this point I used the Amazing Resin kit and again followed the 1:1 mixing instructions on the box.
After 15 minutes the copy was ready to come out and be primed for paint.
I primed the piece using a flat spray paint and allow it to cure for about 8 hours.
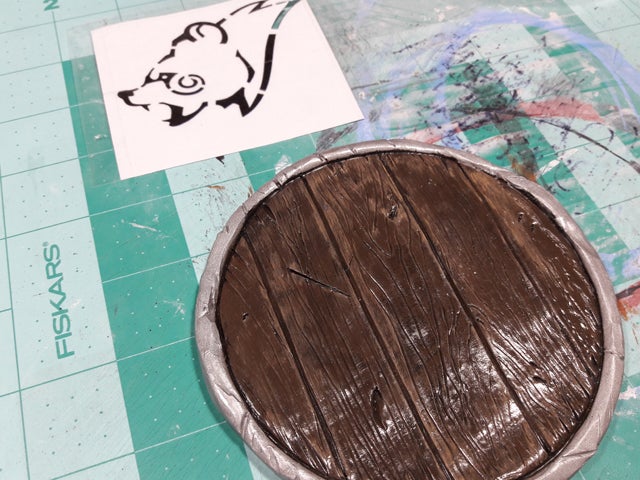
Step 4: Painting
Now I used my acrylic paints to create the wood texture and Testers paint for the metal rim.
I then used clear coat to protect the paint job and moved on to the stencil.
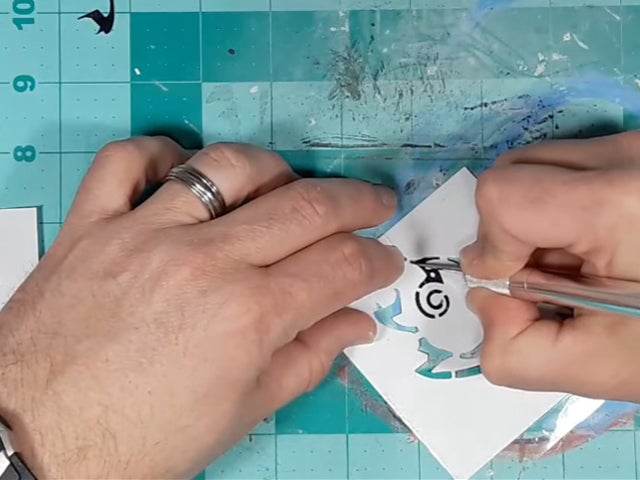
Step 5: Cutting the Stencil
I printed out the Windhelm symbol on my printer, and then applied clear packing tape on the paper.
I used my Xacto knife to cut out the design.
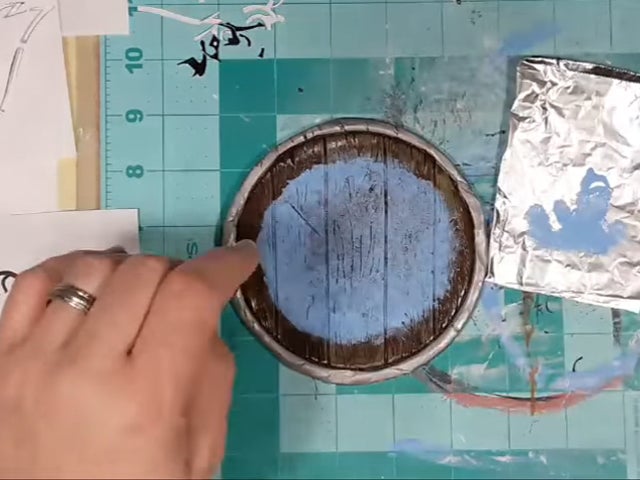
Step 6: Painting the Windhelm Symbol
At this point I used my light blue acrylic paint and applied the paint to the shield leaving some of the wood exposed.
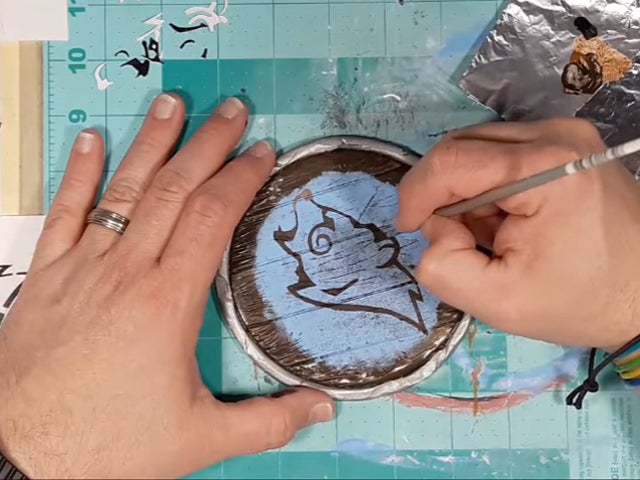
Step 7: Final Touches
I applied the stencil and traced the pattern onto the shield with paint. Once I removed the stencil I used my acrylic paint to finish the symbol with the pattern the stencil created.
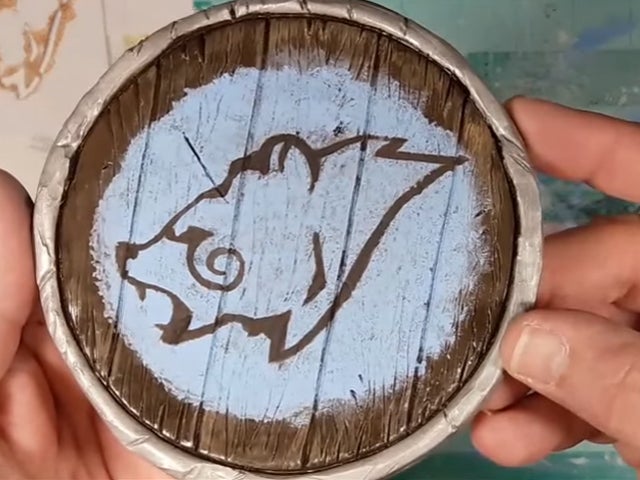
Step 8: All Done!
Once it was dry I applied a final clear coat to the shield, glued the cork on the bottom and called it done!
To follow along in more detail, make sure to view the two videos below. Thank you for watching and I hope you all have just as much fun as I did making these!

Comments
Post a Comment